宝塔面板安装Flarum论坛的安装教(通过离线安装包安装)

Flarum 是一个现代化的开源论坛软件,以其简洁、快速和易用性而闻名。它旨在提供一个美观、响应式、且功能强大的论坛体验,同时易于定制和扩展。Flarum 采用了PHP 和Mithril (一个轻量级的JavaScript 框架) 构建,使其在性能和用户体验上都表现出色。
Flarum官网:https://flarum.org/
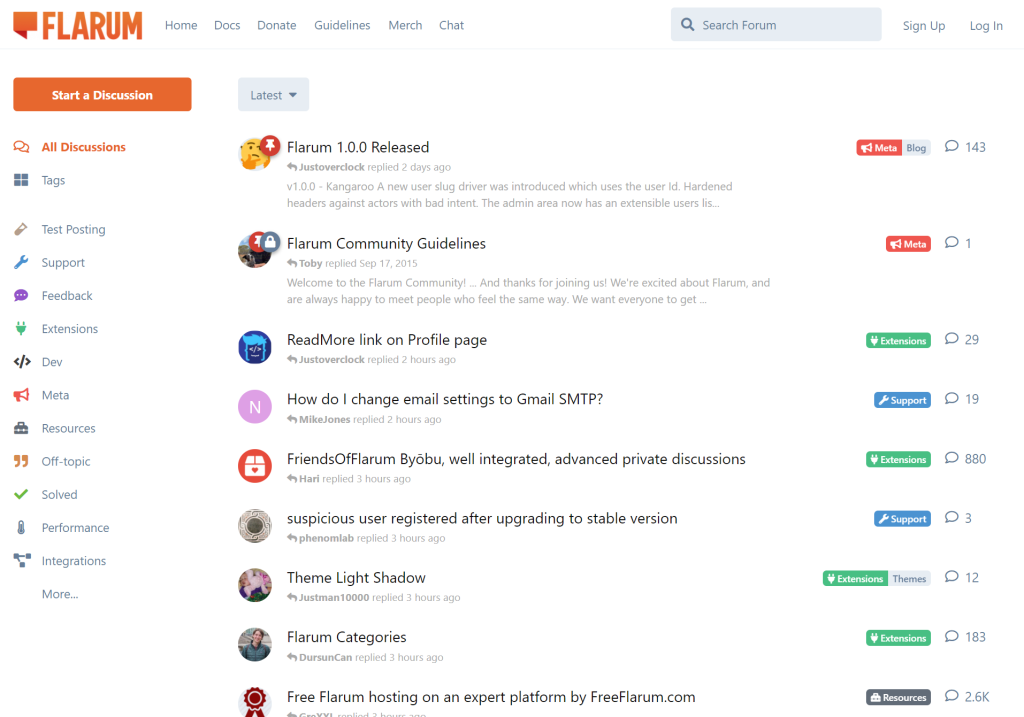
Flarum演示:https://discuss.flarum.org/
Flarum官方文档:https://docs.flarum.org/install/
说明:官方的安装文档已经非常详细了,但是没有宝塔的安装教程,本教程专门写宝塔面板安装Flarum的教程
Flarum论坛安装教程
Flarum论坛只有两种安装方式,一种是通过compser安装,另一种是通过下载Flarum的离线安装包进行安装,本教程我们只介绍最简单的通过离线安装包安装flarum的教程。
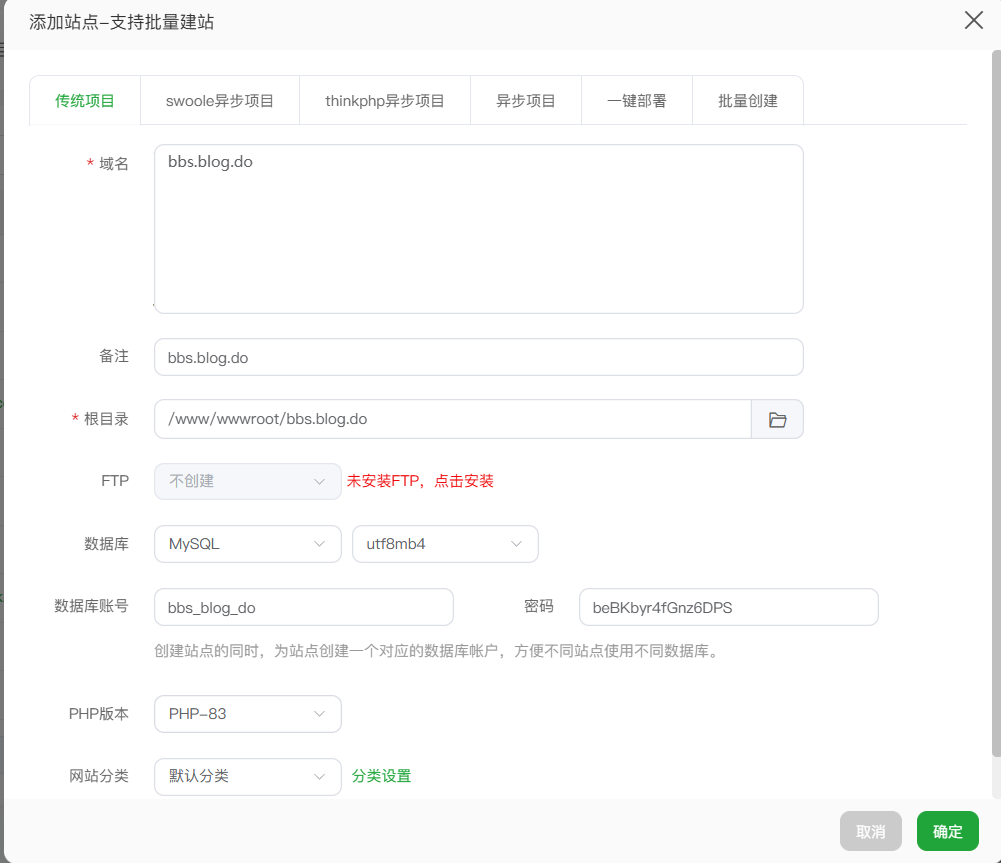
第一步:宝塔面板添加站点
添加站点,绑定域名,PHP版本推荐用8.3,如果没有PHP8.3,需要先安装PHP8.3。
第二步:安装php扩展及解除函数禁用
安装以下扩展:curl, dom, fileinfo, gd, json, mbstring, openssl, pdo_mysql, tokenizer, zip
注意:fileinfo和mbstring必须安装,其他宝塔没有的扩展可以先跳过,并不会影响安装。
解除函数禁用:putenv() 、 pcntl_signal() 、 proc_open()
注意:这三个函数宝塔默认都是禁用的,必须删除禁用才可以正常安装Flarum。
第三步:上传Flarum安装包到网站根目录
官网下载Flarum安装包,上传到网站根目录然后解压,官网下载地址:https://docs.flarum.org/install/
注意:必须下载你网站PHP版本对应的安装包,比如你的网站是PHP8.3的,必须下载PHP Version 8.3的安装包
安装包有两种类型,一种是包含Public文件夹的,这个意思是要把运行目录设置为Public文件夹,另一种是不包含Public文件夹的,这个意思是安装包解压后就是根目录,不需要再额外设置运行目录。
宝塔面板可以修改运行目录,且为了安全起见,推荐使用包含public文件夹的安装包。
| Flarum Version | PHP Version | Public Path | Type | Archive |
|---|---|---|---|---|
| 1.x | 8.3 (recommended) | No | ZIP | flarum-v1.x-no-public-dir-php8.3.zip |
| 1.x | 8.3 (recommended) | Yes | TAR.GZ | flarum-v1.x-php8.3.tar.gz |
| 1.x | 8.3 (recommended) | No | TAR.GZ | flarum-v1.x-no-public-dir-php8.3.tar.gz |
| 1.x | 8.3 (recommended) | Yes | ZIP | flarum-v1.x-php8.3.zip |
| 1.x | 8.2 (recommended) | No | TAR.GZ | flarum-v1.x-no-public-dir-php8.2.tar.gz |
| 1.x | 8.2 (recommended) | Yes | TAR.GZ | flarum-v1.x-php8.2.tar.gz |
| 1.x | 8.2 (recommended) | No | ZIP | flarum-v1.x-no-public-dir-php8.2.zip |
| 1.x | 8.2 (recommended) | Yes | ZIP | flarum-v1.x-php8.2.zip |
| 1.x | 8.1 | No | TAR.GZ | flarum-v1.x-no-public-dir-php8.1.tar.gz |
| 1.x | 8.1 | Yes | TAR.GZ | flarum-v1.x-php8.1.tar.gz |
| 1.x | 8.1 | No | ZIP | flarum-v1.x-no-public-dir-php8.1.zip |
| 1.x | 8.1 | Yes | ZIP | flarum-v1.x-php8.1.zip |
| 1.x | 8.0 (end of life) | No | TAR.GZ | flarum-v1.x-no-public-dir-php8.0.tar.gz |
| 1.x | 8.0 (end of life) | Yes | TAR.GZ | flarum-v1.x-php8.0.tar.gz |
| 1.x | 8.0 (end of life) | No | ZIP | flarum-v1.x-no-public-dir-php8.0.zip |
| 1.x | 8.0 (end of life) | Yes | ZIP | flarum-v1.x-php8.0.zip |
| 1.x | 7.4 (end of life) | No | TAR.GZ | flarum-v1.x-no-public-dir-php7.4.tar.gz |
| 1.x | 7.4 (end of life) | Yes | TAR.GZ | flarum-v1.x-php7.4.tar.gz |
| 1.x | 7.4 (end of life) | No | ZIP | flarum-v1.x-no-public-dir-php7.4.zip |
| 1.x | 7.4 (end of life) | Yes | ZIP | flarum-v1.x-php7.4.zip |
| 1.x | 7.3 (end of life) | No | TAR.GZ | flarum-v1.x-no-public-dir-php7.3.tar.gz |
| 1.x | 7.3 (end of life) | Yes | TAR.GZ | flarum-v1.x-php7.3.tar.gz |
| 1.x | 7.3 (end of life) | No | ZIP | flarum-v1.x-no-public-dir-php7.3.zip |
| 1.x | 7.3 (end of life) | Yes | ZIP | flarum-v1.x-php7.3.zip |
接着,配置Nginx伪静态规则,下面的代码粘贴到宝塔的伪静态设置框,保存即可。
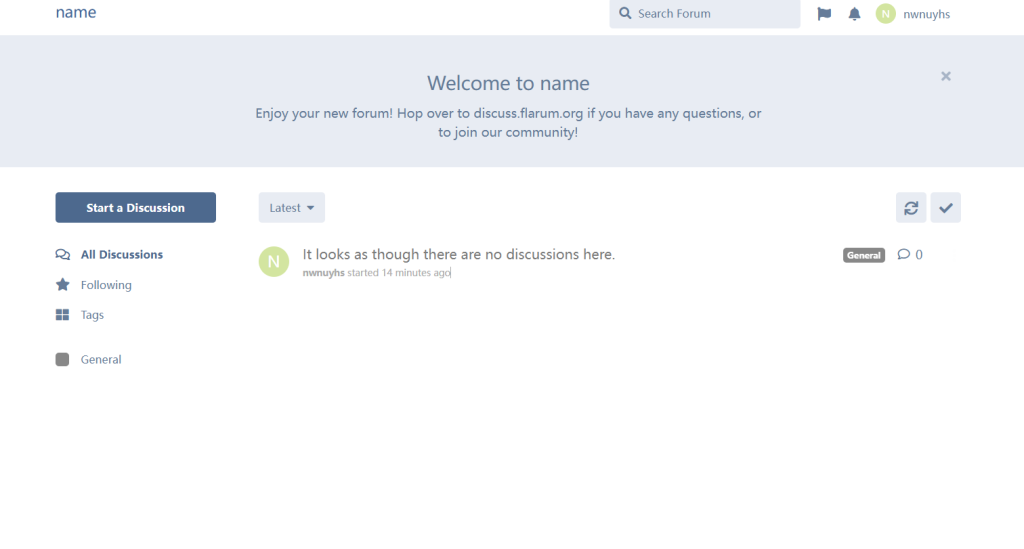
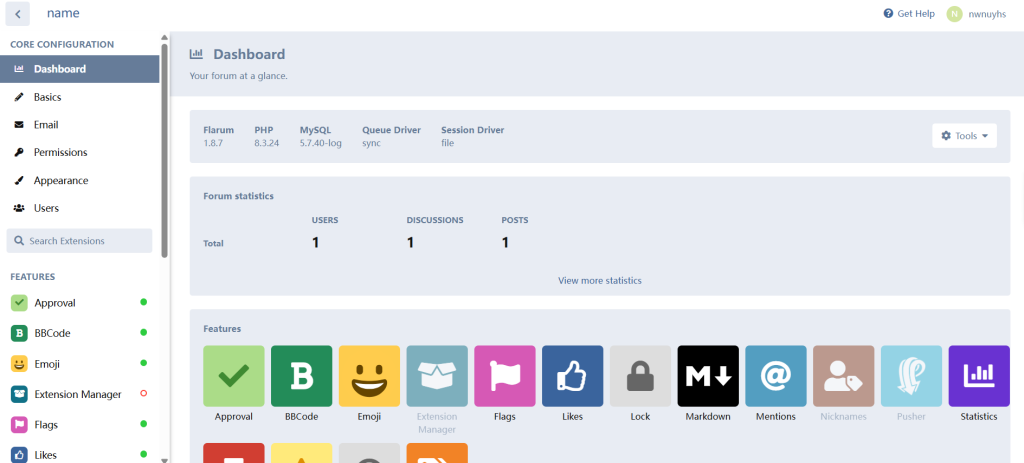
第五步:访问网站首页即可开始安装
上面步骤完成后,直接访问网站首页,即可进入到安装步骤,根据提示输入数据等信息,即可安装成功。
下面是安装成功的前台及后台:
注意:此方式虽然跳过了composer的安装,但是后期的更新和安装插件还是得通过composer运行。